Securing Sensitive Data: Creating Password-Protected ZIP Files in Windows 11
Related Articles: Securing Sensitive Data: Creating Password-Protected ZIP Files in Windows 11
Introduction
With enthusiasm, let’s navigate through the intriguing topic related to Securing Sensitive Data: Creating Password-Protected ZIP Files in Windows 11. Let’s weave interesting information and offer fresh perspectives to the readers.
Table of Content
Securing Sensitive Data: Creating Password-Protected ZIP Files in Windows 11
In today’s digital age, safeguarding sensitive information is paramount. While cloud storage and encryption offer robust protection, there are times when a simple, yet effective method is needed to secure files locally. This is where password-protected ZIP files come into play. This technique provides a straightforward way to restrict access to specific data, ensuring only authorized individuals can view or modify its contents.
This comprehensive guide will delve into the process of creating password-protected ZIP files in Windows 11, outlining the steps involved, exploring the advantages of this approach, and addressing common questions.
Understanding the Importance of Password Protection
Before diving into the technical aspects, it’s crucial to understand why securing files with passwords is essential. In essence, password protection acts as a barrier, preventing unauthorized access to sensitive information. This is particularly relevant for:
- Confidential Documents: Financial records, personal identification details, legal agreements, and other sensitive documents require stringent protection.
- Intellectual Property: Protecting intellectual property like designs, code, and research data is crucial for maintaining competitive advantage.
- Personal Files: From personal photos and videos to sensitive emails and financial statements, securing personal files ensures privacy and prevents unauthorized access.
Methods for Creating Password-Protected ZIP Files in Windows 11
Windows 11 offers several methods for creating password-protected ZIP files, each with its own advantages. Here’s a breakdown of the most common approaches:
1. Utilizing the Built-in ZIP Functionality
Windows 11’s native file explorer provides a simple and efficient way to create password-protected ZIP archives. This method requires no additional software and is readily accessible to all Windows users.
- Step 1: Select the Files to Archive: Navigate to the folder containing the files you wish to protect. Select the files or folders by holding down the Ctrl key and clicking on each item individually, or by dragging a selection box around multiple items.
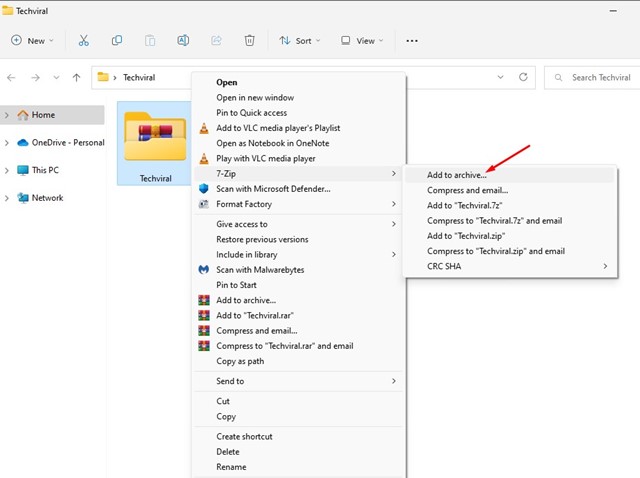
- Step 2: Right-Click and Choose "Add to archive": Once the files are selected, right-click on any of them and choose the "Add to archive" option from the context menu.
- Step 3: Set the Archive Name and Password: In the "Create new archive" window, provide a name for the ZIP file and choose the "ZIP" format. Click the "Advanced" button to access additional options.
- Step 4: Enable Password Protection: In the "Advanced" settings, check the "Encrypt the contents of the archive with a password" box. Enter a strong password twice in the provided fields and click "OK."
- Step 5: Create the Archive: Click the "OK" button in the main window to create the password-protected ZIP file. The archive will be saved in the same folder as the original files.
2. Leveraging Third-Party Compression Tools
For more advanced features and customization options, consider utilizing dedicated compression software. Popular options include 7-Zip, WinRAR, and PeaZip, which offer a wider range of compression algorithms, encryption methods, and additional functionalities.
- Step 1: Install the Compression Software: Download and install the chosen compression software from its official website.
- Step 2: Add Files to the Archive: Open the compression software and select the files or folders you want to archive.
- Step 3: Set Password Protection: Look for an "Encryption" or "Password" option within the software’s interface. Enter a strong password and confirm it.
- Step 4: Choose Compression Settings: Select the desired compression level and archive format (ZIP, 7z, RAR, etc.).
- Step 5: Create the Archive: Click the "Create" or "Save" button to generate the password-protected ZIP file.
3. Using Command Prompt (Advanced)
For users familiar with command-line interfaces, the 7z command-line tool provides a powerful method to create password-protected ZIP files. This method offers fine-grained control over encryption settings and can be integrated into automated scripts.
- Step 1: Download and Install 7-Zip: Download and install the 7-Zip command-line tool from its official website.
- Step 2: Open Command Prompt: Search for "cmd" in the Windows search bar and open the Command Prompt window.
-
Step 3: Navigate to the File Location: Use the
cdcommand to navigate to the folder containing the files you want to archive. -
Step 4: Use the
7zCommand: Execute the following command, replacing[password]with your chosen password and[filename.zip]with the desired name for the archive:
7z a -tzip -p[password] [filename.zip] *- Step 5: Verify Archive Creation: Once the command completes, verify that the password-protected ZIP file has been created in the specified location.
Choosing the Right Method
The best method for creating password-protected ZIP files depends on your specific needs and technical expertise. If simplicity and ease of use are priorities, the built-in Windows 11 functionality is sufficient. For advanced features and customization, third-party compression tools offer a wider range of options. The command prompt method provides maximum control and can be integrated into automated workflows.
Benefits of Password-Protected ZIP Files
Beyond providing a simple barrier to unauthorized access, password-protected ZIP files offer several advantages:
- Portability: ZIP files are easily transferable across different platforms, allowing you to share protected data with others.
- Compression: ZIP files compress data, reducing file size and facilitating efficient storage and transmission.
- Accessibility: ZIP files can be opened and accessed on various devices, including computers, smartphones, and tablets.
- Security: Password protection adds a layer of security, preventing unauthorized access to sensitive information.
- Ease of Use: Creating and managing password-protected ZIP files is straightforward, requiring minimal technical expertise.
FAQs about Creating Password-Protected ZIP Files
1. Can I change the password for an existing ZIP file?
No, once a password is set for a ZIP file, it cannot be changed without specialized tools. It is recommended to create a new archive with the desired password.
2. What happens if I forget my password?
If you forget the password for a ZIP file, it becomes impossible to access its contents without specialized password recovery tools. These tools are often complex and may not guarantee success. It is crucial to store passwords securely and avoid forgetting them.
3. How strong should my password be?
A strong password should be at least 12 characters long, include a mix of uppercase and lowercase letters, numbers, and symbols, and avoid common words or personal information.
4. Can I use the same password for all my ZIP files?
While it’s convenient, using the same password for all your ZIP files is highly discouraged. If one password is compromised, all your protected data becomes vulnerable.
5. Are password-protected ZIP files truly secure?
While password protection adds a layer of security, it’s not foolproof. Advanced attackers may be able to crack weak passwords or exploit vulnerabilities in the ZIP file format. For highly sensitive data, consider using stronger encryption methods or specialized security solutions.
Tips for Creating Secure Password-Protected ZIP Files
- Use Strong Passwords: Choose long, complex passwords that are difficult to guess.
- Avoid Common Words and Personal Information: Avoid using names, birthdays, or other easily guessable information in your password.
- Store Passwords Securely: Use a password manager or a secure notepad to store your passwords safely.
- Regularly Update Passwords: Change your passwords periodically to minimize the risk of compromise.
- Consider Additional Security Measures: For highly sensitive data, explore additional security measures like encryption software or hardware security keys.
Conclusion
Creating password-protected ZIP files in Windows 11 offers a simple and effective way to safeguard sensitive information. The built-in functionality, third-party compression tools, and command-line methods provide various options to meet different needs. By utilizing strong passwords and practicing good security habits, you can significantly reduce the risk of unauthorized access to your important data. Remember, while password-protected ZIP files offer a valuable layer of protection, they should be considered part of a comprehensive security strategy, incorporating other measures like strong passwords, secure storage, and regular updates.

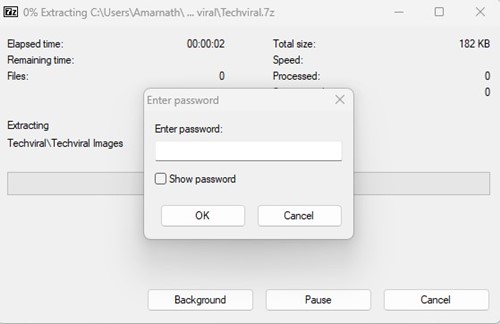

![How to Password Protect Zip Files in Windows 11 [3 Tips]](https://cdn.windowsreport.com/wp-content/uploads/2023/01/Enter-password-WINRAR.jpg)
Closure
Thus, we hope this article has provided valuable insights into Securing Sensitive Data: Creating Password-Protected ZIP Files in Windows 11. We hope you find this article informative and beneficial. See you in our next article!